Casey Reeves making a cutting board of Padauk, Bloodwood, Walnut and Hard Maple from Exotic Wood Zone. Here he narrates how he made this beautiful cutting board, the Exotic Wood Zone Fire and Spice 3x4 lumber Cutting Board.
Hey there everyone! Today, I am making a cutting board walk you through the steps that I used to create this amazing Fire and Spice cutting board! I used Exotic Wood Zone woods to create this piece and they offer some amazing woods. I chose padauk, bloodwood, walnut, and hard maple for this one.
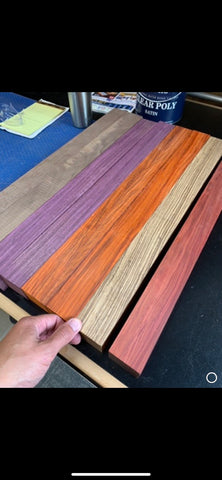
The first thing that I did was joint and plane the material to be around 1-1/2” square by 2’ long. I then just started trimming some of the pieces to random widths at my table saw. I wanted the original blank to have some disruption to it. After I liked the layout, I used my parallel clamps to lock it all down overnight.
The next day, I took the boardwood chopping block out of the clamps and squared everything up on my planer and drum sander.
Next, was the hard part. Trying to decide how to cut up the board to get the look that we were after. I determined an angle across the board (22 degrees) There was no math or anything in the spacing of my lines. I just did what I thought looked good. That is the beauty of this piece. Art through chaos and randomness.
Once I had all my pieces drawn out on the board with pencil, I added a 22-degree wedge to my table saw crosscut sled. I then proceeded to cut all the pieces to the lines that I had drawn out.
The next step was to flip and turn the boards around to see what pattern we liked most. Again, strictly up to the creator on what they want and like. Get creative and have fun!
Once you get a pattern that you are happy with, you must glue it all together and clamp it up again! One thing that you need to keep in mind, is that you are now clamping on an angle. You should make some scrap pieces that match your angle and use those to create a parallel clamping angle. Otherwise, the board will slide apart once you start tightening the clamps.
With the glue dry, run the board through the flattening process again. I used the drum sander as the board stayed relatively flat on this glue up.
With everything flat and level, I trimmed the overall dimension to 18” x 14.5” x 1.5”. I added a 22-degree chamfer to the sides and edges using my table saw. Then it was onto lots and lots of sanding. I have a standard pattern that I follow when I sand. I start at 80-100 (depending on the wood and current state of the board), then, 120, 150, 180, and then 220. I then use water to raise the grain on the board and let is dry completely. I then resand at 220 and then 320.
One last detail that I like to add is a counterbore for the rubber feet. This allows the board to stay low to the countertop, while staying in place. Be sure to predrill the screw holes. You don’t want the screw to split the wood at this point.
Now all that was left, making a cutting board was the oiling process. You can wipe on a food safe oil of your choice or, I like to use a giant tub of mineral oil and let the board soak overnight. Then the next day, I use a butcher block conditioner and buff the board until it has a nice satin sheen.
That is it! You should have a gorgeously chaotic wood chopping block that will have your friends full of envy!
Take care and thanks for tuning in!
Casey Reeves
CReeves Makes
Checkout Casey's Website here
Follow Casey on
Facebook
Instagram
Youtube